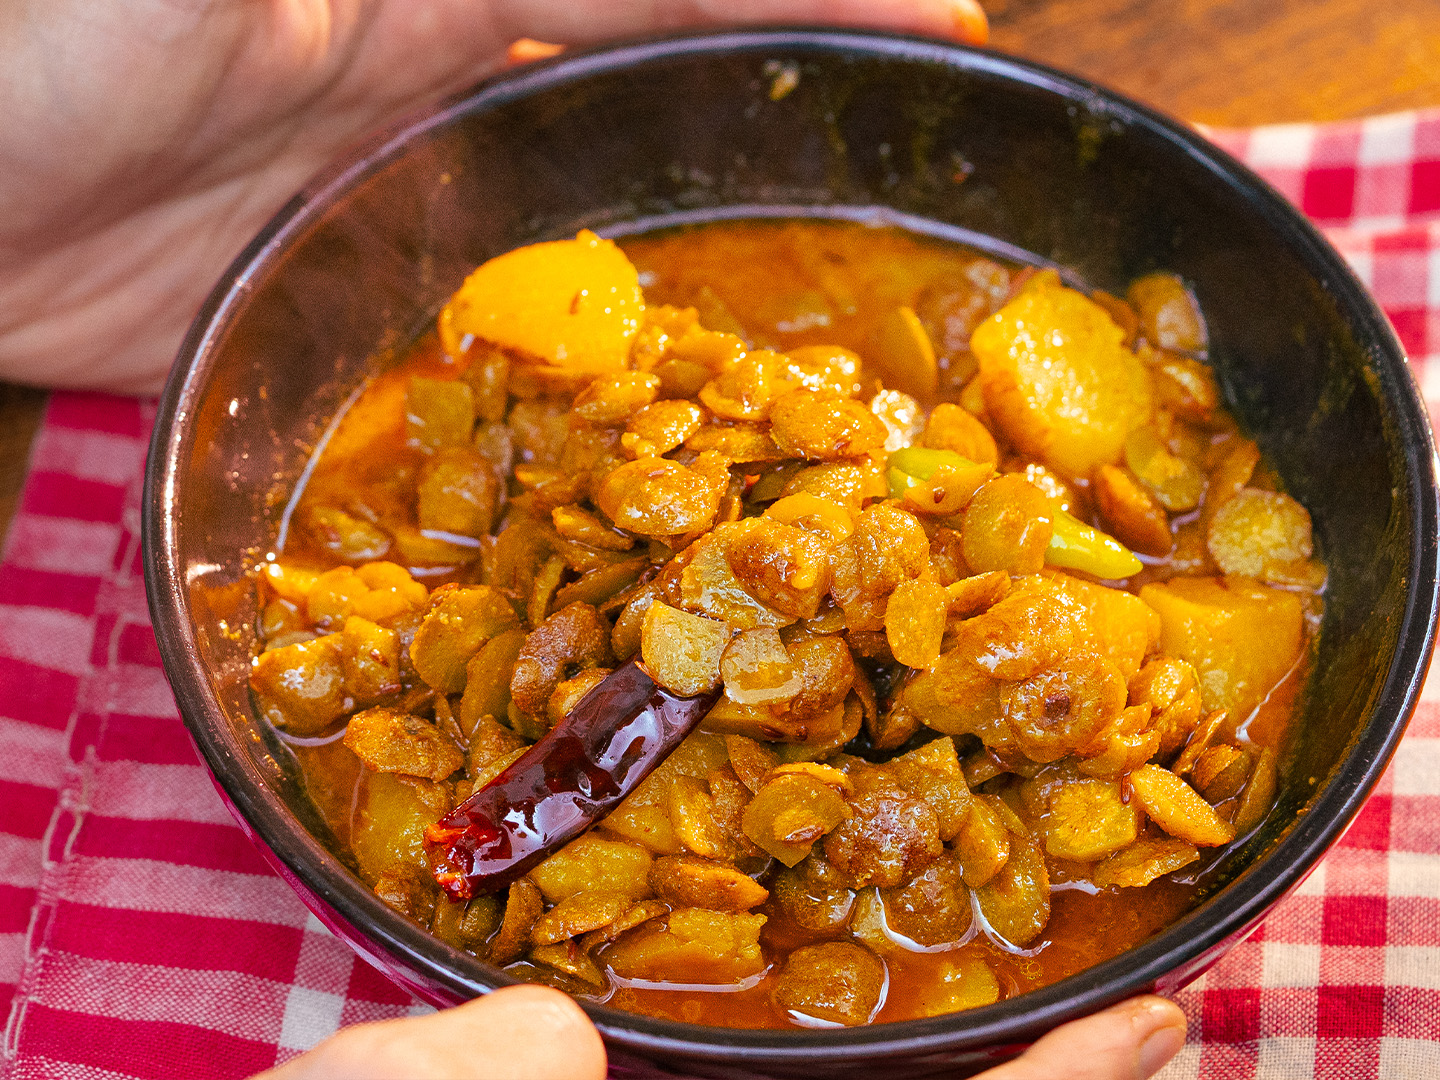
Chhola’r Dal
The savoury-sweet cholar dal is a Bengali classic. Bursting with warm, mellow flavours, it is easy to make and insanely delicious.
- Cooking time45 minutes
 Calories197kcal

Breakfast, lunch, dinner—this is a dal recipe for all occasions.
Every family has its own the classic Bengali chholar dal recipe. In fact, the Bengali culinary tradition is replete with easy dal recipes for every occasion. This is the niramish or vegetarian version of the Bengali chholar (or chholar) dal, prepared without onions or garlic. Hing (asafoetida) supplies the necessary sharpness that one would generally get from the use of onions. The best part about this warm, mellow, delicious coconut-and-raisin (narkel aar kishmish) strewn chholar dal? It can be served for breakfast, lunch or dinner, with rice, polao, luchi, kochuri or porota! It doesn’t get more versatile than this. Master this Bengali chholar dal recipe and it is sure to become the secret weapon in your culinary arsenal for when you are looking for an impressive, yet quick, easy, Bengali vegetarian dal preparation.
In this video recipe, we show you how to make chholar dal (or chana dal, as it is known in Hindi) that has the perfect balance of sweet and savoury flavours, and the right consistency and texture. Although this preparation is a Bengali classic, other parts of India, and Pakistan and Bangladesh, too, enjoy their own versions of this delicious and nutritious chana dal.
Frequently Asked Questions
What is chholar dal?
If you take a dried Bengal gram seed, remove the seed coating, and separate the two cotyledons, you get chholar dal. So, chholar dal is dehusked, split Bengal gram. It is also known as chana dal in some other South Asian languages.
Is chana dal same as chickpea or garbanzo?
There are two types of chickpeas that are common in South Asian cooking, that have very different texture and taste when cooked.
Bengal gram is smaller and has a smooth, dark brown seed coat. Under the husk, the cotyledons are yellow.
Kabuli chhola (garbanzo) on the other hand is larger in size, has a pale pink, crinkly seed coat, and under the husk the cotyledons are very pale in colour.
Chana or chholar dal comes from the first variety—Bengal gram. This is also what besan is commonly made from.
Can I make chholar dal without soaking the dal?
You can cook chholar dal directly in a pressure cooker without soaking them first. The pressure cooking time will be slightly higher.
Here is how to do it. Add the dal along with water, salt and any other aromatics you want to add in a pressure cooker. Close the lid, place the pressure cooker on the stove and turn on the heat to high.
Once it reaches full pressure—you will hear a stable hiss—turn down the heat to the lowest and set a timer. Consult your pressure cooker manual for the exact time. On Hawkins Futura models, this is 5 minutes.
The goal is to maintain full pressure without letting the whistle go off (or for the whistle to go off as few times as possible).
After 5 minutes (or however minutes your pressure cooker manual says), turn off the heat and let the pressure release naturally. This can take 10 minutes.
Open the pressure cooker and check if the grains are nicely cooked but unbroken. If the dal is too soft, make a note for the next time. If it is undercooked, note that too.
After one or two trials you will know the perfect time for your pressure cooker and stove.
Can I make chholar dal without pressure cooker?
You can make chholar dal without a pressure cooker. It will just take you longer. Depending on the dal, the hardness of water, whether or not you soaked the dal, it can take more than 45 minutes to boil chana dal in a normal pot.
You will need more water than in our recipe because a lot more water will be lost to evaporation. Check every fifteen minutes to see if the water is drying up and add more hot water if necessary.
If you are going to be spending an hour or more boiling the dal, we would recommend making a larger batch for efficient use of resources. You can freeze the boiled dal in small portions in airtight containers.
The day before you plan to cook chholar dal, transfer the dal from the freezer to the fridge, to allow it to thaw gently. Then you can cook with it just as you would normally.
How long to pressure cook chana dal? How many whistles?
It is best not to count whistles for pressure cooking even though that is the most common method used in South Asia.
The more accurate and energy-saving method is to start a timer from after the pressure cooker reaches full pressure. Even your pressure cooker manual suggests this method.
Here is what to do:
With your ingredients and sufficient water close the lid, place the pressure cooker on the stove and turn on the heat to high.
Once it reaches full pressure—you will hear a stable hiss—turn down the heat to the lowest and set a timer. Consult your pressure cooker manual for the exact time. For chholar dal, for example, on Hawkins Futura models, this is 5 minutes.
The goal is to maintain full pressure without letting the whistle go off (or for the whistle to go off as few times as possible). Whenever the whistle goes off it means that the pressure had built up so high that it had to be released to allow for the the pressure to come down. Doing this repeatedly just wastes your LPG, or electricity.
After 5 minutes (or however minutes your pressure cooker manual says), turn off the heat and let the pressure release naturally. This can take 10 minutes.
Can I make chholar dal without hing?
Hing or asafoetida is a natural resin that comes from Afghanistan. It is often used in Bengali cooking to replicate the flavour of onion-garlic in dishes that traditionally don’t use onion or garlic.
You can make chholar dal without hing. If you don’t have hing, you can do what my mother does. She finely dices quarter of a small onion (about 15 grams) and adds it to the oil just after the whole spices.
The onion approximates the flavour of hing, which was historically used to approximate the flavour of an onion!
Why is sugar added to chholar dal?
For an umami flavour saltiness in food is often balanced with something sweet. This is true in almost all cuisines all over the world. In most other South Asian cooking this sweetness comes from slow cooked onion and garlic.
Broadly speaking, in niramish Bengali recipes—meaning vegetarian recipes which do not use onion and garlic—sugar is added to compensate for the absence of any other sweet element.
Chholar dal, specifically, chholar dal that is served with luchi, is noticeably sweet, particularly the ones you will find in sweetmeat shops in Kolkata. Chholar dal, at least in Kolkata, is more sweet than it is salty.
If you are unfamiliar with this flavour palette, start with using at least the same weight of sugar as salt in the recipe for the perfect balance. With this ratio, you won’t necessarily register the dish as sweet. It will just taste balanced.
How is that possible? This is because salt is saltier than sugar is sweet. If you taste one gram of salt it is going to taste very strongly salty. One gram of sugar in comparison won’t taste as strongly sweet.
Can I make chholar dal without coconut?
You can make this recipe without the coconut. It will still be quite tasty.
The coconut adds a contrasting texture to the mushiness of the dal. Frying it in oil also produces a beautiful flavour. It is very subtle, but the fried coconut does elevate the dish.
Why is the ghee brown?
Bengali ghee has a deeper, nuttier flavour than the light yellow ghee used in other parts of India. The light ghee is only used for deep frying in Bengali cooking.
Get yourself a bottle of Bengali ghee. If you are outside West Bengal, Amar Khamar has some excellent ghee. You will find many other uses for it in your kitchen.
Can I use dessicated coconut?
Fresh coconut can be easily substituted with dessicated coconut in this recipe. Remember to use less dessicated coconut since it is going to be lighter in weight than fresh coconut.
How many people can eat 200 g dal?
Since this is a thick dal you need a little more dal per person than with a runny dal. For very generous portions take 50 gram dal per person. If you have other dishes you are serving alongside 200 gram dal can feed upto six people.
Can I skip raisins?
You can skip the raisins if you are not a fan of raisins.
If I want to cook 400 grams should I just double the recipe?
Yes. You can double all ingredients except the water. You will need a little less than double the water because water loss due to evaporation is determined by your cooking vessel and stove heat output—it does not scale linearly with the other ingredients.
What is bengali garam masala? Is it different?
Yes, Bengali gorom moshla is simpler. You can buy the Bong Eats Bengali Garam Masala from Amar Khamar if you like. It is made fresh in small batches every week.
Even better, you can make it at home yourself following our Bengali Gorom Moshla recipe.
Can I add coriander leaves to chholar dal?
You can do anything you want in your kitchen, don’t let anyone tell you otherwise. That said, coriander leaves are not traditionally added to this recipe. If you want to experience what Bengali chholar dal actually tastes like, make it without coriander leaves the first time.
Ingredients

- 200 g chhola or chana dal (split Bengal gram)
- 20 g coconut (thinly sliced)
- 20 g raisins
- 20 g mustard oil
- 1 pc cinnamon
- 5 pcs cardamom
- 3 pcs cloves
- 4 pcs bay leaves
- 2 pcs dried red chillies
- ½ tsp cumin seeds
- ¼ tsp hing (asafoetida)
- 30 g ginger paste
- 2 g turmeric powder
- ½ tsp coriander powder
- 3 g cumin powder
- 6 pcs green chillies (slit)
- ¼ tsp Bengali garam masala
- 5 g ghee
- 18 g salt
- 24 g sugar
- 700 g water
Method
- Rinse the chhola’r dal well and soak it in water for at least 2 hours. After this time, strain the dal and transfer it to a boiling pot or pressure cooker. Add 700 g water, 6 g salt, and the bay leaves. Boil the dal until it is tender, but the grains are still whole. The texture of this dish will depend a whole lot on how well the dal is boiled. We want each grain of lentil to be perfectly cooked, but not turned to mush. On medium heat, our chhola’r dal cooks to the desired doneness in 2 whistles. The time may vary for you.
- Before you begin cooking, make a spice slurry by mixing together the ginger paste, cumin powder, coriander powder, turmeric powder and 50 g water. Also, slice the coconut and slit the green chillies.
- Heat mustard oil in a pan (on medium heat) and once it starts to smoke lightly and changes colour to a pale yellow, add the thinly sliced coconut. Fry until the coconut turns golden brown. This should take about a minute. Remove from the oil and set aside.
- Temper the same oil with the dried red chillies, cardamom, cinnamon, cloves, and cumin seeds. Stir in the hing, allowing it to fry for about 10 seconds.
- Add the spice slurry we made earlier to the pan. Fry on medium heat until the raw smell of the spices is gone. This should take about 6 minutes. Add the slit green chillies and raisins, and continue frying until you see oil leaving the sides of the spice mixture.
- Now add the boiled dal along with the water to the pan. (If you feel there’s a lot of excess water with the dal, reserve some in a bowl.)
- Add the remaining salt (12 g) and allow the dal to bubble until it thickens (about 6 to 8 minutes). Depending on how soft or hard your dal is, you may have to adjust the flame and water accordingly. For example, if your dal is still slightly hard, boil on low heat, adding water to maintain consistency, until it is cooked. If it is on the softer, mushier side (first of all, you need to make note of where you went wrong and try correcting the boiling time on your next attempt!), turn up the flame to thicken the dal quickly.
- Pick out a softened green chilli from the dal, mash it with the back of a spoon and add it back to the dal. Add the sugar and bubble for about a minute before stirring in the ghee, Bengali garam masala, and fried coconut. Allow the dal to rest, covered, for 2 minutes before serving.


.avif)